Introduction
Leaks from water flow sensors can create functional problems in your daily routine and financial consequences by causing water waste, driving up utility costs, and damaging additional components. SMWF 0.5 represents a widely employed model for water management systems throughout different applications. If you’re struggling with How to Repair Leaking Water Flow Sensor SMWF 0.5, this article will guide you through understanding the issue and fixing it effectively.
Understanding How to Repair Leaking Water Flow Sensor SMWF 0.5
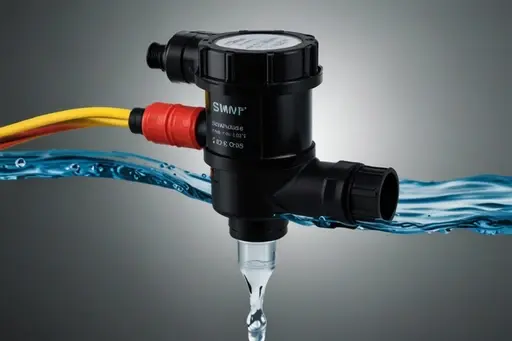
The SMWF 0.5 is a minimal yet effective water flow sensor that measures pipe water velocity. The compact construction and precise performance capabilities allow this sensor to work effectively across residential com, commercial, and industrial operations. The water flow sensor SMWF 0.5 shares the same vulnerability as other mechanical devices by developing leaks as it ages. The SMWF 0.5 experiences leaks mainly because of product deterioration, flawed installation procedures, and natural degradation of parts.
How to Repair Leaking Water Flow Sensor SMWF 0.5 effectively:
it’s essential to understand its structure and working mechanism. The flow sensor operates with two parts: an inlet, an outlet, and a spinning rotor with an internal magnet that provides flow rate measurement data through signal-based communication. These elements are safeguarded by an enduring outer protective enclosure, which protects them from environmental conditions. The SMWF 0.5 develops leaks because its casing suffers cracks, the seals fade, or installation connections become loose.
Common Causes of Leaks in the SMWF 0.5
Before diving into How to Repair Leaking Water Flow Sensor SMWF 0.5, it’s crucial to identify the root cause of the issue. Below are some of the most common reasons for leaks:
Damaged Seals: Sensor seals’ lifespan decreases, enabling water to seep out from joints.
Cracked Casing: Under certain physical stresses or harsh environmental conditions, the sensor casing may develop fractures, which cause water leaks.
Loose Connections: Installation flaws and movement-related vibrations can cause unprotected connections between the sensor and pipeline.
Mineral Buildup: Hard water deposits may accumulate at the sensor openings, leading to pressure problems and eventual leakage conditions.
Aging Components: Leakage occurs when internal components suffer damage from extended, non-maintained usage.

Tools and Materials Needed for Repairs
How to Repair Leaking Water Flow Sensor SMWF 0.5 requires a few essential tools and materials. Ensure you have the following on hand before starting the repair:
Adjustable wrench or pipe wrench
Plumber’s tape
Replacement seals or O-rings
Silicone sealant (if needed)
Cleaning solution or vinegar
Soft brush or cloth
Screwdriver set
Replacement casing (if applicable)
Your repairs will work efficiently when you organize your tools and materials before beginning work.
Step-by-Step Guide to Repairing the Leak
Step 1: Turn Off the Water Supply
To avoid additional leakage, stopping water flow from the sensor SMWF 0.5 requires turning off the water supply. Before starting any work, stop the water flow by immediately activating the main water valve. You can suppress leakage in sensor systems by switching off the controlling system valves.
Step 2: Inspect the Sensor
Look at the water flow sensor carefully to find where the water is leaking from. Examine the sensor for signs of cracks, as well as examine worn seals and loose connections. You must clear mineral deposits from the leak site because they block your view of its location through sensor cleaning with soft tools and solutions.
Step 3: Disassemble the Sensor
How to Repair Leaking Water Flow Sensor SMWF 0.5: you’ll need to disassemble it. The screws which assemble the casing need to be removed using a screwdriver with caution. Record all element positions within the sensor because they will help during your future assembly.
Step 4: Replace Damaged Seals
Use new parts to replace damaged seals and O-rings. When you put the maintenance pieces back together, use a narrow strip of plumber’s tape around the sensor threads. This process will create better resistance, helping to prevent leaks from recurring after you fix your leaking water flow sensor SMWF 0.5.
Step 5: Repair or Replace the Casing
Keep open areas of the casing sealed using silicone sealant. Squeeze the silicone sealant on the targeted crack space and allow it to dry according to labeled instructions. Casing replacement becomes the optimal choice when the crack severely damages sensor performance. This is crucial when you need How to Repair Leaking Water Flow Sensor SMWF 0.5 to avoid further issues.
Step 6: Reassemble the Sensor
Reinstall all components slowly after finishing the required sensor repairs. Ensure that every section maintains proper alignment while securing all components end to end. Secure each connection point with finger pressure until the sensor still functions correctly, although extremely tight tightening of screws could damage the threaded components. Learning to fix a leaking water flow sensor SMWF 0.5 requires proper completion of this step.
Step 7: Test the Sensor
When the sensor assembly is finished, turn the water supply back on to confirm that no leaks exist. Successful protection is calculated when the sensor operates correctly without showing signs of water leakage. Watch the sensor for up to a few minutes to verify that the problem has disappeared. Testing is a key step when you are working on How to Repair Leaking Water Flow Sensor SMWF 0.5.

Preventive Measures to Avoid Future Leaks
To minimize the risk of future leaks in your SMWF 0.5 water flow sensor, follow these preventive measures:
Regular Maintenance: Detection quality will suffer if you do not clean the sensor periodically. Mineral residue could build up, harming its operation.
Proper Installation: To maintain secure connections, you must always follow the manufacturer’s sensor installation instructions.
Inspect Seals: You should inspect the sensor seals frequently and install new ones when damaged for moisture protection.
Protect from Physical Damage: The sensor needs protection from intense environmental conditions and impacts that threaten to break its casing.
Use Compatible Parts: To prevent operational failures, installing components must match the specifications of the SMWF 0.5 model.
Annual maintenance following these measures helps stop future water flow sensor repairs involving SMWF 0.5.
Troubleshooting Persistent Issues
If you’ve followed the steps to repair a leaking water flow sensor SMWF 0.5 but still experience issues, consider the following troubleshooting tips:
Check for Hidden Cracks: Most leaks in the casing or internal components escape visual detection. Using a flashlight will help you see every part of the sensor.
Test the Water Pressure: High water pressure puts stress on the sensor, which can damage the components and cause leakage. You should install pressure regulation equipment during setup.
Consult a Professional: Professionals must inspect the internal system for defects because ongoing problems demand repair or replacement. A professional will assist you with repairing your leaking Water Flow Sensor SMWF 0.5 because their expertise can stop additional damage while saving you time.

Conclusion
How to Repair Leaking Water Flow Sensor SMWF 0.5 may seem daunting, but it’s a manageable task with the right tools and a systematic approach. Using the proper maintenance sequence outlined in this guide, you can fix your sensor leakage while ensuring entire operation and minimizing water consumption.
Regular maintenance combined with proper installation practices helps your SMWF 0.5 water flow sensor survive longer. Quick action on problems reduces the need for expensive repairs, which creates a foundation for sensor longevity.